
Ingredients:
- Royal Icing
- Chocolate Candies
- Sugar Cones
- Fondant and Gum Paste Blend (White, Blue and Green)
- Chocolate Mini Cupcakes
- Vegetable Shortening
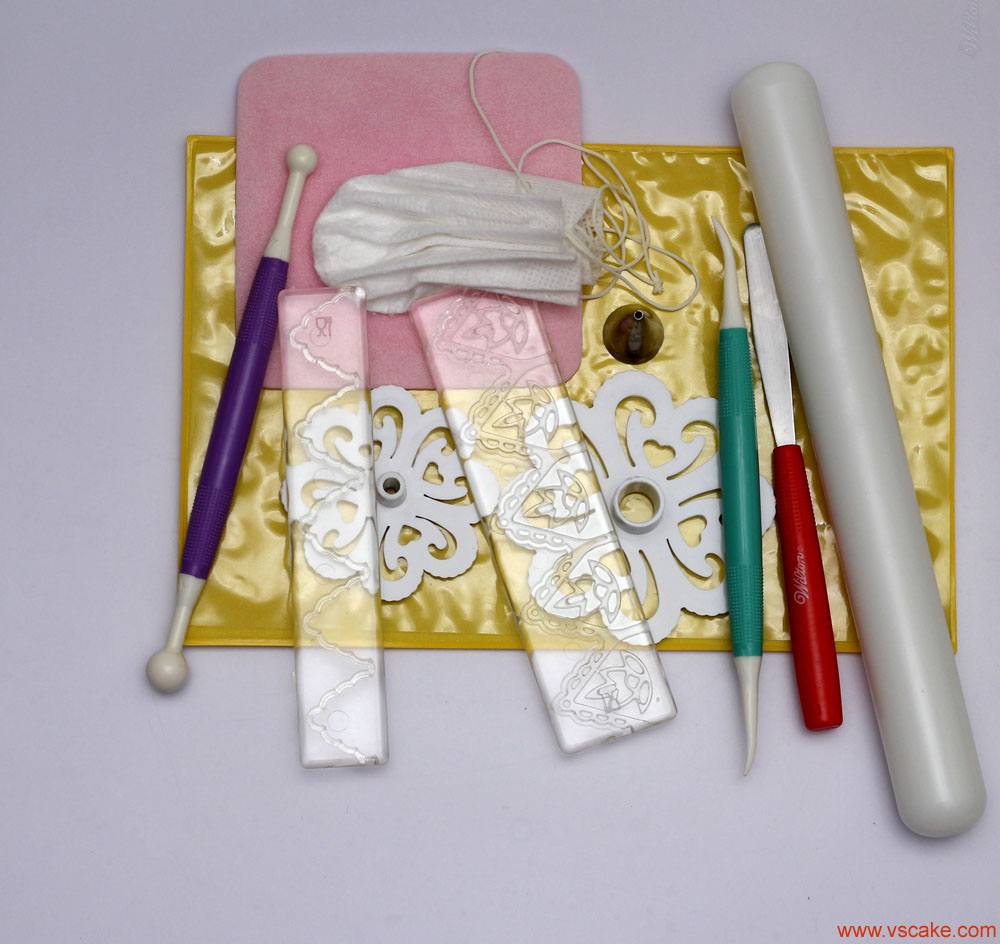
Tools:
- Rolling Pin
- Veining and Ball Tool
- Thin Foam
- Dusting Pouch
- Board
- Practice Board
- Tip 3
- Piping Bag
- Spatula
- Wilton Decorating Bag Holder
- Heart Flower Cake Fondant Gum Paste Clay Mold Cutter SugarCraft Toppers (Medium and Small Cutter)
- Cake Fondant SugarCraft Cookie Gum Paste Frill Frilling Edge Skirt Cutter
Directions:
How to prepare the Sugar Cone with candies and mini cupcake:
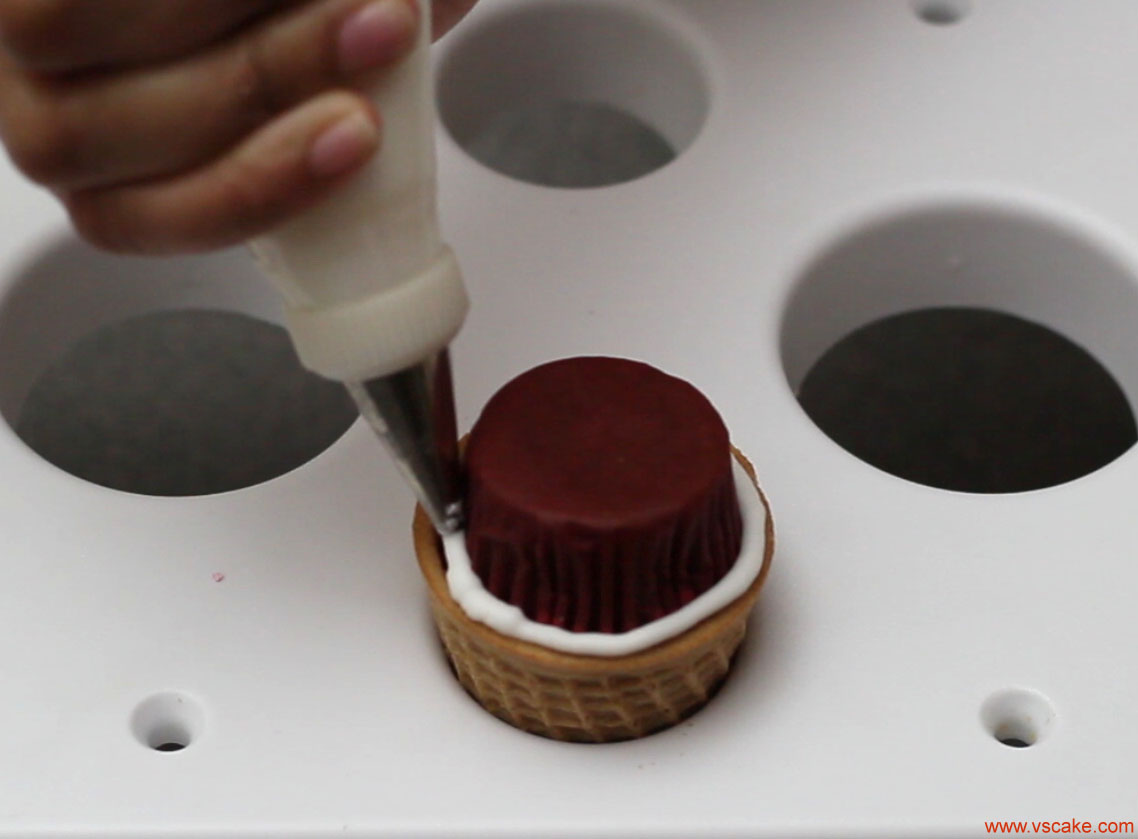
Step 1: Place the Sugar Cones upside down on the Wilton Decorating Bag Holder. Wilton Decorating Bag Holder holds six Sugar Cones at one time
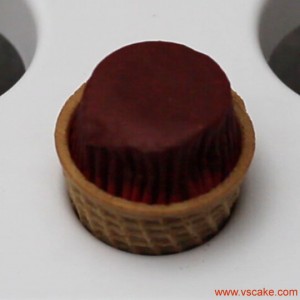
Step 2: Fill the Sugar Cones up to 3/4th way with chocolate candies.

Step 3: Place a mini cupcake upside down on the opening.
Step 4: Pipe two rows of royal icing using tip 3 between the mini cupcake and the edge of sugar cone to seal them together. Let them dry for 30 minutes.
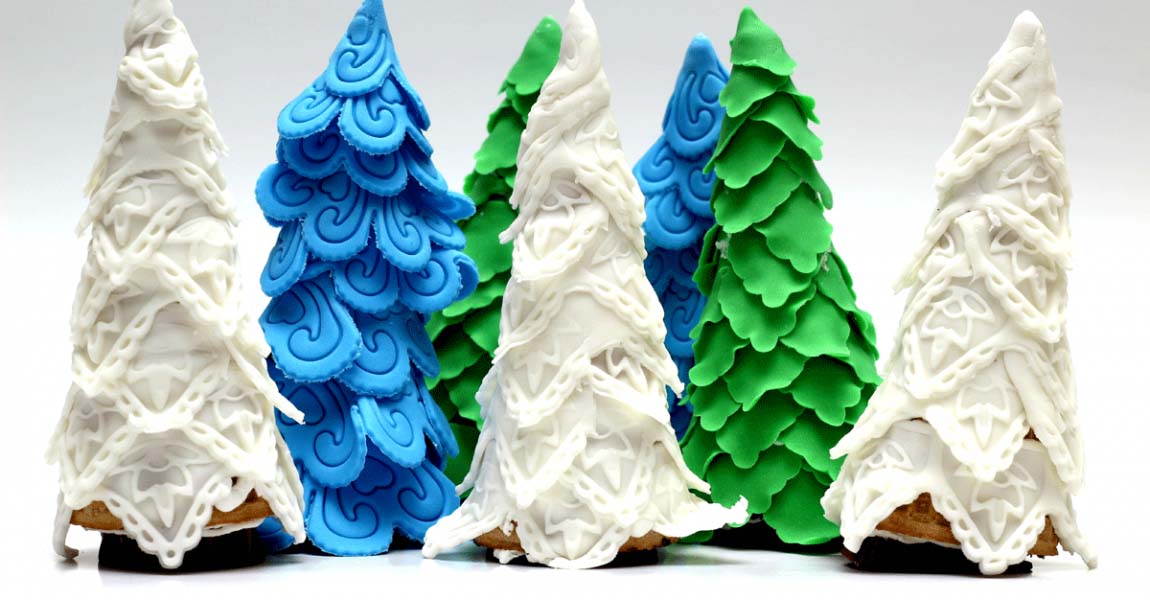
How to decorate the Sugar Cone Christmas Trees
White Lace Sugar Cone Christmas Tree
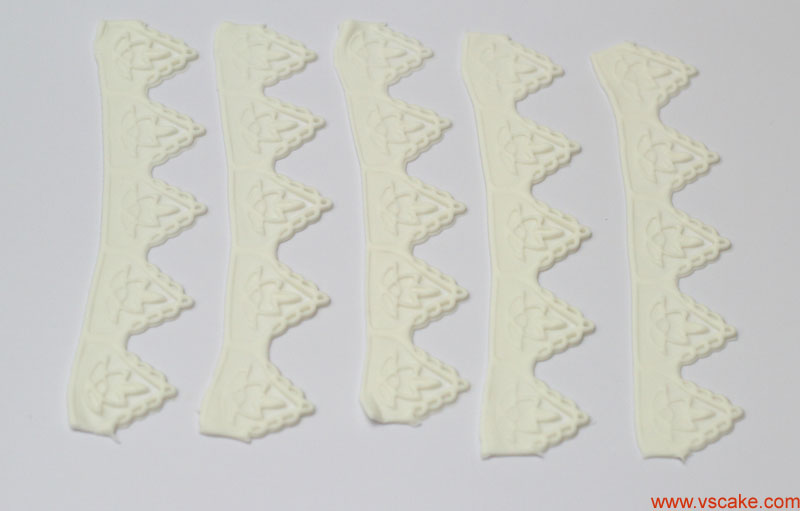
Step 1: Roll the white fondant gum paste blend 1/8th inch thick with rolling pin.
Step 2: Use the cutter of your choice from Cake Fondant SugarCraft Cookie Gum Paste Frill Frilling Edge Skirt Cutter and apply firm pressure to get the imprint of the edge skirt cutter. Use small spatula to cut a line on top of each cut-out when the cutter is in place.
Step 3: Use the edge cutter for the bottom of the cut-outs to release it with smooth finish.
Step 4: Use the small spatula to cut the sides of the frills. Remove the excess fondant out.
Step 5: Make 5 edge skirt cut-outs for one Sugar Cone Christmas tree.
Step 6: Pipe royal icing zigzag using tip 3 on the bottom of the Sugar Cone.
Step 7: Place the Edge Skirt Cutout, wrap it around the sugar cone and attach in place.
Step 8: Pipe royal icing line 1/4th inch higher on the cone and wrap another cutout in place, slightly going higher with each cut-out.
Step 9: Keep repeating the process until the edge skirt cut-outs are wrapped in between each edge and attached in place.
Step 10: Attach the last cut-out in place by pinching the top to make a cone shape.
Step 11: Gently try to lift the pointed edges of the skirt cut-outs with your fingers and set it aside to let the Christmas tree dry.
Blue Heart Sugar Cone Christmas Tree
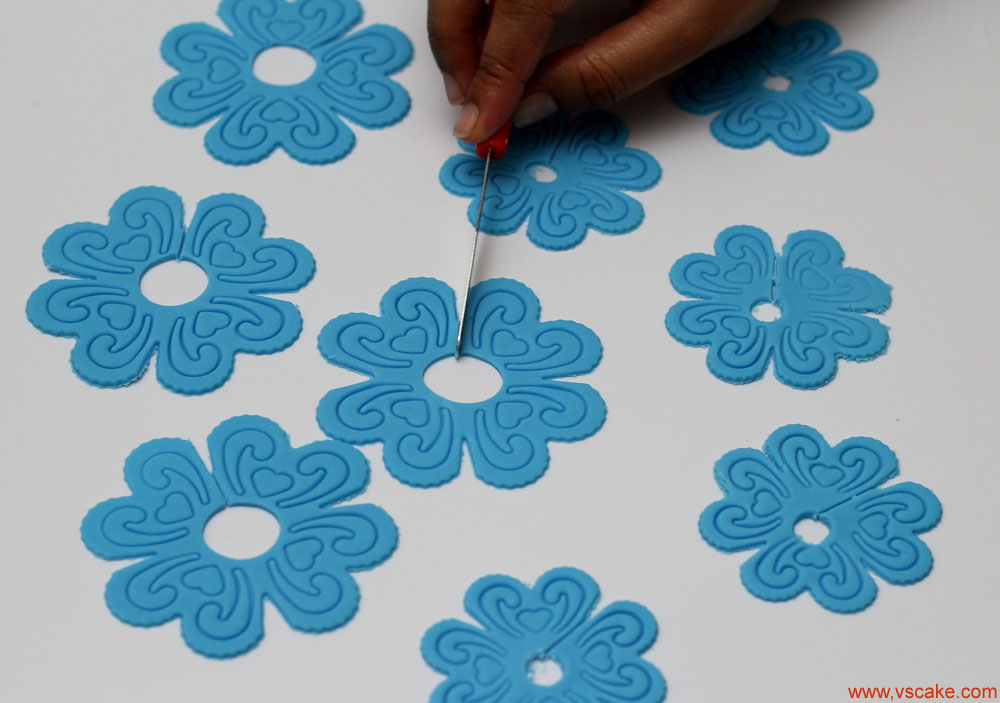
Step 1: Roll the blue fondant gum paste blend 1/8th inch thick with rolling pin.
Step 2: Use the medium and small Heart Flower Cake Fondant Gum Paste Clay Mold Cutter to make cut-outs. Press firmly in place and make 4 medium and 5 small cut-outs for one Sugar Cone Christmas tree.
Step 3: Using the narrow end of the small cutter and cut the center out of the small cut-outs.
Step 4: Using the wide end of a tip cut-out the small circle out of the medium cut-outs.
Step 5: Remove the excess blue fondant and set it aside. Using the narrow end of the veining tool remove the excess blue fondant from between the petals for each cut-out.
Step 6: Make a cut between the petals on one side of the heart flower cut-outs.
Step 7: Pipe a line of royal icing with tip 3, wrap and attach the top edge of the heart flower cut-out around the sugar cone.
Step 8: Pipe each line of royal icing 1/4th inch higher than the top edge of the heart flower cut-out to wrap and attach the cut-out around the sugar cone.
Step 9: Attach two or one petal cut-out as needed to finish each row.
Step 10: Attach the last cut-out in place by pinching the top to make a cone shape.
Step 11: Set it aside to dry.
Traditional Green Sugar Cone Christmas Tree
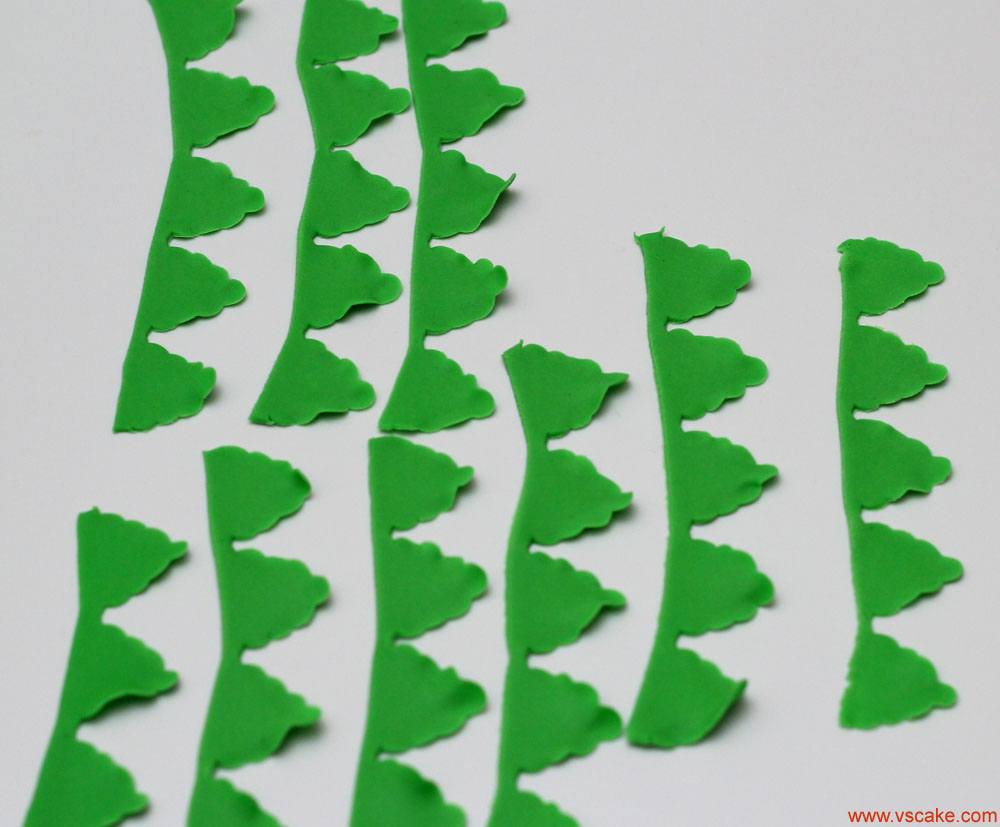 Step 1: Roll the green fondant gum paste blend 1/8th inch thick with rolling pin.
Step 2: Use the edge skirt cutter from Cake Fondant SugarCraft Cookie Gum Paste Frill Edge Skirt Cutter and apply firm pressure to get a clean cut.
Step 3: Use small spatula to cut a line on top of each cut-out when the edge skirt cutter is in place.
Step 4: Cut the sides of each cut-out and remove excess fondant out. Make about 8 to 9 cut-outs for one Sugar Cone Christmas tree.
Step 5: Dust the thin foam with dusting pouch and place out cut-out in a U-shape.
Step 6: Dust the top of the cut-out and smooth the edges with the wide of the ball tool. Set it aside to dry.
Step 7: Repeat the process of thinning the edges of the cut-outs and set it aside to dry.
Step 8: Pipe a line of royal icing with tip 3, wrap and attach the top edge of the cut-out around the sugar cone.
Step 9: Pipe each line of royal icing 1/4th inch higher than the top edge of the cut-out to wrap and attach the cut-out around the sugar cone.
Step 10: Keep repeating the process until the cut-outs are wrapped in between each edge and attached in place.
Step 11: Attach the last cut-out in place by pinching the top to make a cone shape.
Step 12: Set it aside to dry.
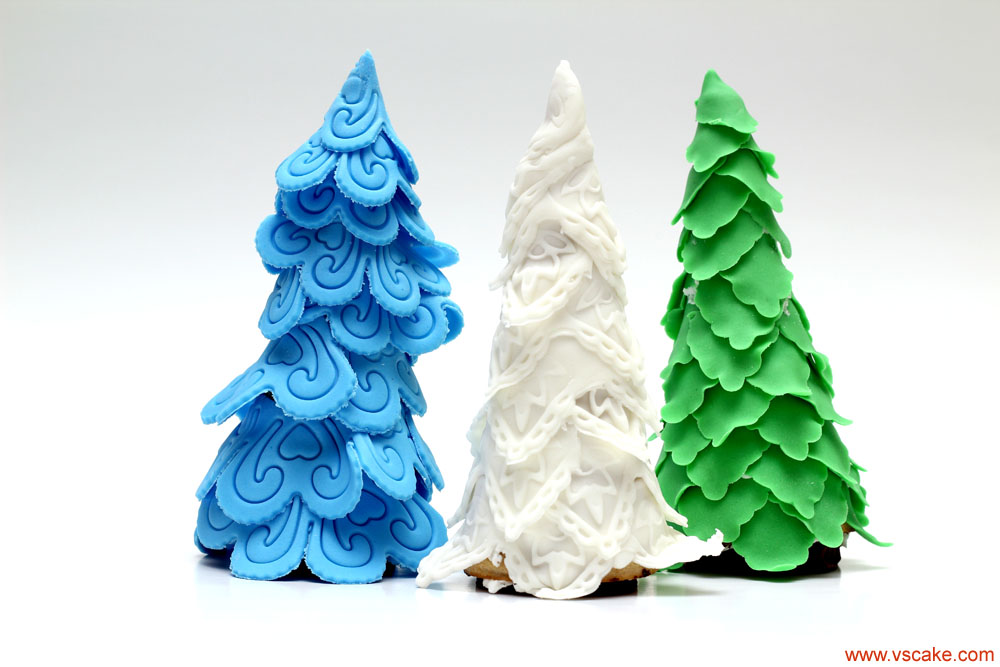
Beautiful Snow Cone Christmas Trees are ready to enjoy with friends and family. Wonderful gift giving project to share and have fun with your kids and family that tastes as delicious. Inexpensive and creative gift that most would love of have as present this holiday season, made with lots of love for my viewers and readers!